Showing posts with label Valentines Day. Show all posts

Wednesday, May 14, 2014

Love Shadow Box

Hi everyone, I just wanted to check in to let you know that I will be returning soon.  I only have one more week of daycare and we will have a little break.  I watch mostly teacher's children so I drop way down in the summer.  I am only open a couple of days of week for crafts and fun.  It also keeps the kids in contact with me so it is not such a shock when school starts again.  I have been wanting to share my shadow box with you for sometime now (since Valentines Day).  I made it for my Red Hutch's Valentine display.  I liked it so much I decided to keep it and hang it it my bedroom.  I still can't believe I got the shadow boxes (I actually have two) from savers for only $1.99 each.  I LOVE them and can hardly wait to fix my second one. 


I did add a little pink to our wedding picture to tie it into the pink heart.  Here is how I made the heart.  I also painted the Love sign to match my black and white vintagey (is that a word?) feel.  It used to be bright pink.


The flowers are from Pick Your Plum and I made the cute burlap rosette.


I got the key for only .50 cents from Micheal's when they had all of their dollar (1.50) items on sale.  I got a few other things and will have a couple of crafts soon.


I even got to use on my clay hearts.  I just tied a little lace and ribbon on.


Well, that's it for now.  I also wanted to tell you, THANK YOU.  Thank you for following along and leaving me during this crazy year.  I appreciate you all and look forward to regular posts and visits with everyone.

See you soon.

xoxo

Monday, March 31, 2014

Valentines Day / St. Patty's Day at The Roost

Well, here I am again, freaking out because it has been a while since my last post.  I really want to apologize for not being consistent.  I just let life and all it's crazy get in the way.  I can't promise it won't happen again, but, I can promise to try harder.  If you have any tricks to help you keep consistent with your blog, PLEASE, PLEASE, PLEASE, share them with me in the comment section.  I would really appreciate it.  Now, a little in my defense, the structure of my daycare has changed a little.  This is the first time in twenty years, that every child attending is the youngest in their family.  All of them are very emotional with a side of crazy tantrums.  Even though I don't have very many kids, I work harder now than I did when I first started this business (please, keep me in your prayers).  So with that said, I wanted to share my Valentine and St. Patty's Day decor with you even though it is very late.


I got these candles for a song after Christmas and  fell in love with them.  They are so gitchy.  They also inspired the candy cane hearts again this year.


This was hanging in the Daycare zone.


Sweet LOVE Birds.  Can you believe I got them at the 99 cent store?


Can you see that the jute is in the shape of a heart?


Well, that was my Valentine decor.


On to St. Patty's Day.  I really had fun with it this year.  I pulled things from everywhere.  Anything green wasn't safe - ha ha.


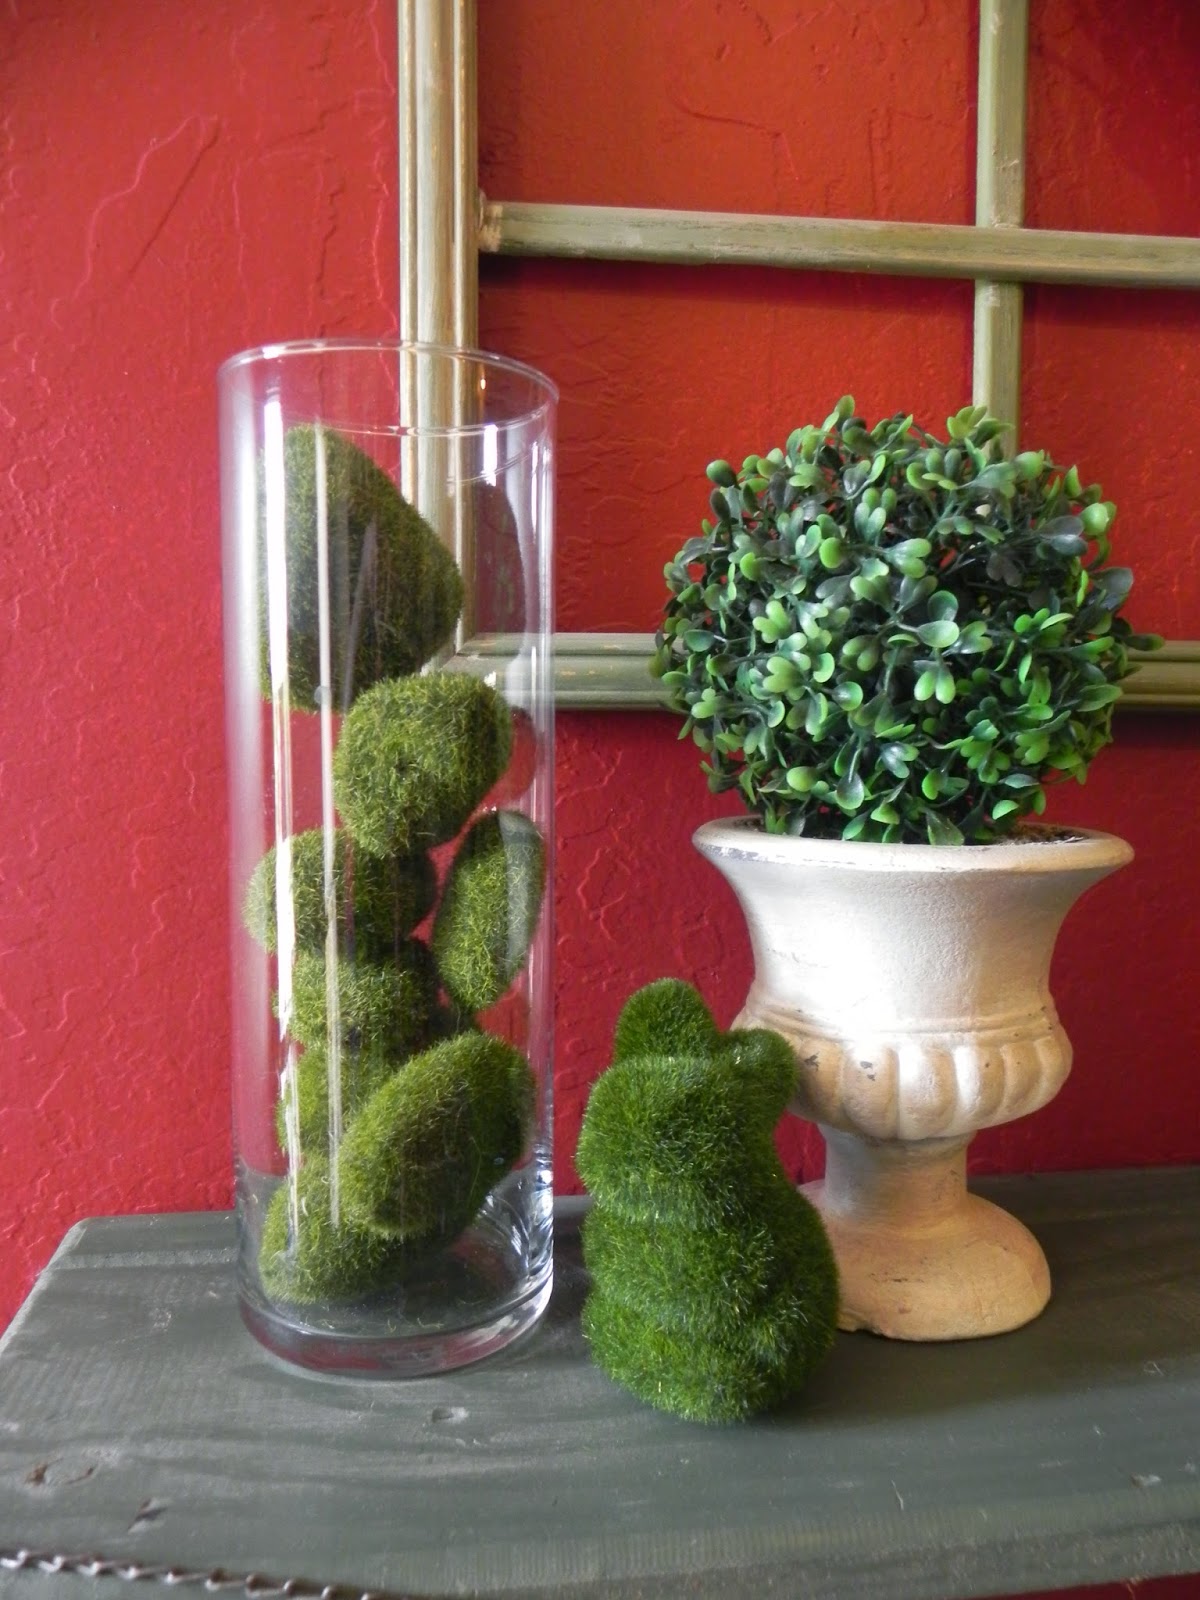
This was my favorite grouping.  I love the fuzzy green rocks in the cylinder vase, and, I got these bunnies last year and didn't know what to do with them.


Sweet green birdie from my "Bird Box".

I did do a couple of little crafty things, but, you will have to wait until next year to see them - tee hee.

xoxo


Monday, February 3, 2014

Hanging Hearts

I had so many candy canes left over this year, I just had to use them for Valentines Day, again.  But, after you see my entryway shelf, you will know why.  I made quite a few, fifteen to be exact.  Now everyone knows what they are getting for V-Day from me - ha ha.  Anyway, this little ditty has my heart a pitter patter.  


I got the frames at Michael's for only eight dollars.  I couldn't believe it because it was originally thirty.  I loved it so much a got a couple including the cute red one.  I wanted to use it at Christmas, but, didn't get around to it -- next year I will.


I just tied the hearts on with a little raffia.


I made these a couple of years ago.  I truly make these every other year.  I think they are so pretty.


In the corner of the frame, I just tacked on these rosettes.  I had them in my stash and just added a pretty red heart to the white one.


I love how it turned out.  I have it hanging in my entryway.  I will have additional entryway pictures soon.


xxxooo


Friday, January 31, 2014

I Love Pick Your Plum

I got this darling little frame from Pick Your Plum with one purpose in mind.  I have never done a Washi Tape project.  This was perfect for one don't you think?  It doesn't just have to be for Valentines Day either.  A sweet picture of anyone would just look Divine.


I just shot it with some Heirloom White paint and distressed it a little.  It matches all of my other decorations on Big Red.


This is how it came.


Did you get one of these?  Let me know how you fixed yours up.

xxxooo


2014 Valentine Glass Block

Happy Friday Everyone!  I have been working on my Valentine decorations and wanted to show you my Valentine Glass Block.  I really enjoy my glass block.  I won it at Bunco a few years back, and, use it for every season.  


In the morning, I love to turn it on and pour myself a cup of coffee.  The light is just right to sit, enjoy a cup of coffee and pray for my family.


I got my cute lights from Target's dollar spot.


I repurposed my LOVE letters from a previous project,


slapped on a bow and called it Love at first sight - ha ha.

Let me know how your decorations are coming along.

xxxooo


Monday, January 27, 2014

Valentine Heart Necklaces

Hi Everyone, I am hoping that you had a great weekend and a great start of a new week.  I finally finished my project and I am so excited over these little pretties.  I have been looking at polymer clay for sometime now.  I used to watch a crafting show and they had polymer clay projects all the time, but, I was always too afraid to try it.  I am always so happy when I do what I tell my kids, "just try it, what is the worst thing that will happen".  Because usually, I'm amazed and wonder why I was intimidated in the first place.  So, this week, whatever intimidates you, just try it.  I know you will be pleased with the outcome. 


I used some ribbon and cord I had in my craft supplies instead of a chain for a couple of them.  I just used ribbon clamps, cord crimps and jump rings to achieve a more professional look (I was just going to tie them at first - ha ha).  I found that on YouTube too.


To make the hair pins, I took the end of the hair pin and dug a little clay out so that my pin would fit in there and lay right.  I used e6000 glue - I hope it holds (sorry, it is not a very good pic.).


The green love necklace, I just used a couple of rubber stamps and rubbed some green paint in it (that technique, I have to practice).


What do you think?  I like of like them.  I am not a jewelry person, so, it is really hard for me to come up with ideas.


This is what I started with.  They are Pearl, White, and Ballerina Pink.


Before you roll it out, you need to condition it.  To do that, you just work/squeeze it in your hands until it is soft.  Then I rolled it out sandwiched between a piece of wax paper.  That just kept the surface smooth.


I used the smallest heart cookie cutter I had.


Cut it out like a cookie and I used this to make the hole in the top for a jump ring.


I looked on YouTube and found a tutorial for the roses.  That was it, and, I was so surprised how easy it was.  Oh, after getting them ready, I baked them in a 275 degree oven for about 15 min.

The tough part was adding the jump rings and figuring out which chain to use.

XXXOOO